Network
What is Cloudflare?

Since August 29, 2024, X (formerly Twitter) has been blocked in Brazil for failing to comply with court orders to remove profiles that violated Brazilian laws, particularly during the election period. However, on September 18, X briefly became accessible again. The reason? Cloudflare. The legal debate surrounding the legitimacy of Twitter's is a sensitive and complex issue, which I will not delve into further in this article.
Table of Contents
- What is Cloudflare for?
- The Pros and Cons of Cloudflare
- A Technical Perspective
- Cloudflare Zero Trust Network Tunnel
- Conclusion
To the surprise of Brazilian Twitter users, on September 18, Twitter unexpectedly became accessible again in Brazil. Legally, nothing had changed. So, how did Twitter suddenly resume its operations in the country?
The answer? Cloudflare. Twitter began operating behind Cloudflare, and soon after, every news outlet started explaining what Cloudflare is. Is it a shield? An armor that Elon Musk used to protect Twitter from the Brazilian Supreme Court? Is Cloudflare a fail-proof solution against the Supreme Court's blockade? As you probably know, Twitter went offline again two days later. Let's dive in and see how Cloudflare works in practice.
What is Cloudflare for?
In short, Cloudflare acts as an intermediary between your online service (like a website or media server) and the internet, offering security and performance improvements. But why add an intermediary?
There are several reasons. The most obvious is that Cloudflare provides protection by blocking attacks on your infrastructure and handling SSL connections and certificates for you, which is very convenient.
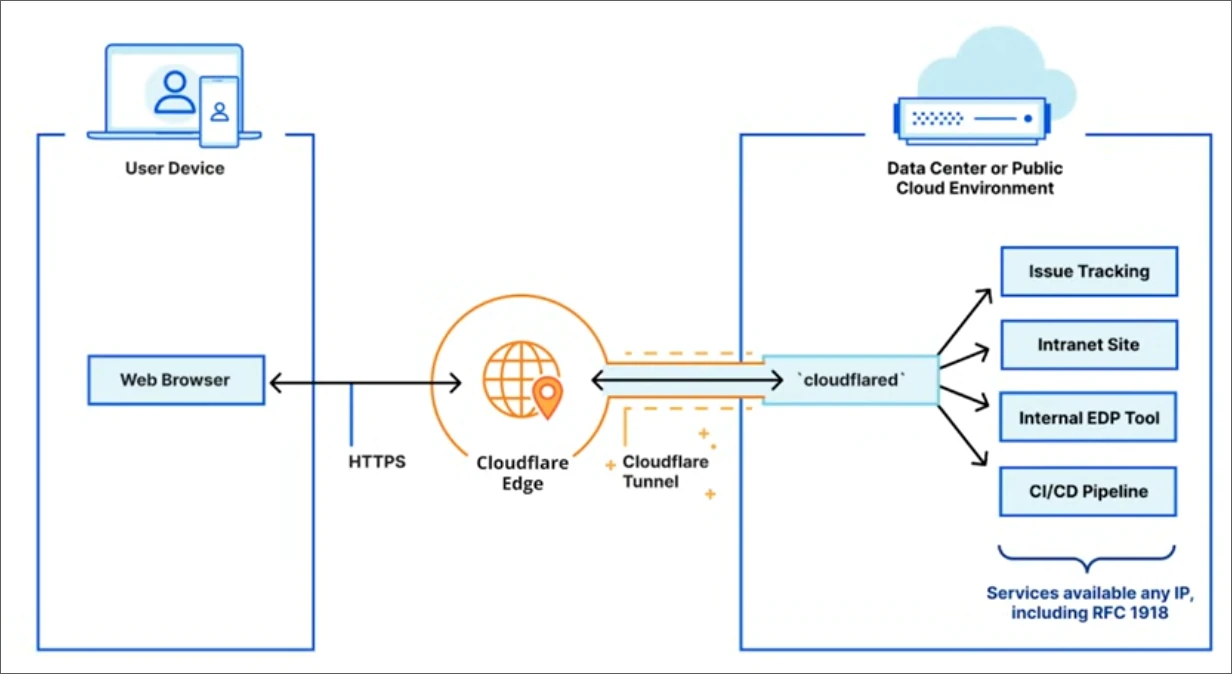
Another reason is that through Cloudflare's Zero Trust network tunnel, it is possible to make services behind a private network (without a public valid IP address, such as CGNATed networks) available to the internet. This could include a Jellyfin media server, a file server (NAS) in your home, surveillance cameras, or even your private cloud storage.

You might assume I have a large infrastructure with many employees or that I'm using a big company to host this website, but that's not the case. This site is actually hosted on an old Mac Mini from 2010. In fact, several of my services are running on that small, yet reliable, machine.
As a Linux server connected to the internet 24/7, it becomes a valuable target for those who want to commit crimes online. It's just a matter of planting some malicious script, and anything could happen. From someone watching everything I'm doing online, to crypto mining, or even using it as a proxy for illegal activities. So, placing something between this server and the open internet is a great security measure.
The Pros and Cons of Cloudflare
Let's take a closer look at Cloudflare to understand the benefits and potential drawbacks of using their services.
Pros
- It's free!
- Adds a security layer to your network by acting as an intermediary between your server and the internet.
- Manages SSL certificates for you.
- Easy to use and configure.
Cons
- Relies on a third-party partner and their infrastructure.
- Opens a tunnel connection between your premises and a third party, which, if not properly managed, could allow the third party to gain visibility into your network traffic.
- While connections between your clients and Cloudflare are protected, the data inside the tunnel isn't encrypted. Even if you set up an HTTPS server, Cloudflare will decrypt the data and re-encrypt it with their certificate. This means Cloudflare can see all your traffic, including sensitive information like personal data or passwords, if your site handles such information.
Let's be honest. Cloudflare is a reputable company with strong partners in the market. While there are no known cases of them spying on their clients, it is technically possible if they chose to. Their solution is branded as "zero trust," which, as the name suggests, means you shouldn't trust anyone. Keep this in mind when transmitting sensitive information over their network.
A Technical Perspective
To understand how Cloudflare operates, let’s explore its core functionalities, including the Zero Trust Tunnel and how to easily make a website hosted in your home network available to the internet.
Since this blog covers the technical aspects of these subjects, let's take note of the services offered by Cloudflare, and follow a step-by-step guide on how to set up a Cloudflare Zero Trust Tunnel and publish a website with ease.
Cloudflare Zero Trust Network Tunnel
After their DNS management service, one of the most notable services Cloudflare offers is the Zero Trust Network Tunnel. This service allows us to easily expose local services with the internet. In this example, I will host a simple webpage and make it accessible online.
This step-by-step guide is heavily based on the YouTube video by Raid Own: Cloudflare Tunnel Setup Guide - Self-Hosting for EVERYONE. I recommend checking it out.
Requirements
We will use a tool called cloudflared, which can be installed on any operating system. For this guide, I’ll be using Ubuntu Linux. Before we begin, make sure you have:
- Created a Cloudflare account.
- A fully qualified domain name (FQDN).
- A Linux machine hosting a website.
Linking Your Domain with Cloudflare
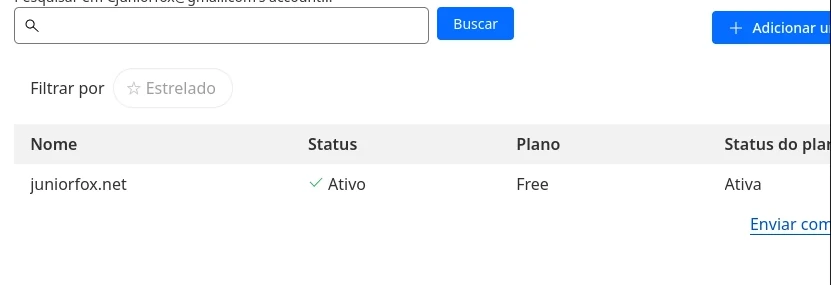
Once logged into Cloudflare, add your domain and set the nameservers in your domain manager. This step may vary depending on your provider. In my case, I'm using Hostgator, and I set the DNS like this:

It may take some time (up to 24 hours) for the settings to propagate and become functional. Since I’m already using Cloudflare, my domain is already activated.
Installing Cloudflared
I set up a virtual machine, installed Ubuntu, and configured it to allow SSH connections. I am now accessing the machine. This section follows the steps provided in Cloudflare's Getting Started Guide.
1. Install Cloudflared tool
# 1. Add Cloudflare’s package signing key:
sudo mkdir -p --mode=0755 /usr/share/keyrings
curl -fsSL https://pkg.cloudflare.com/cloudflare-main.gpg | sudo tee /usr/share/keyrings/cloudflare-main.gpg >/dev/null

# 2. Add Cloudflare’s apt repo to your apt repositories:
echo "deb [signed-by=/usr/share/keyrings/cloudflare-main.gpg] https://pkg.cloudflare.com/cloudflared $(lsb_release -cs) main" | sudo tee /etc/apt/sources.list.d/cloudflared.list

# 3. Update repositories and install cloudflared:
sudo apt-get update && sudo apt-get install cloudflared
2. Authenticate on Cloudflare
Run the command below.
cloudflared tunnel login
You will be shown a big URL with an authentication string like this one.
https://dash.cloudflare.com/argotunnel?aud=&callback=https%3A%2F%2Flogin.cloudflareaccess.org%2FyO5QTw53edgtamTbyJb9TtlzHNnnDLNApcx3gSo%3D
Just copy and paste it into your browser. An authorization screen will be shown.
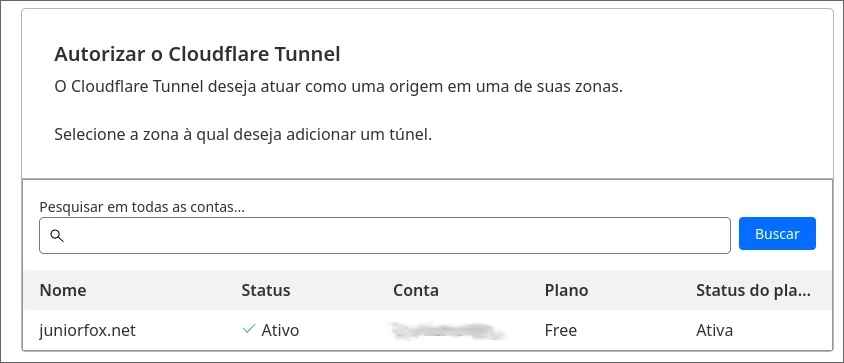
Click on your domain and authorize. Cloudflare will automatically install a cert file in the user's home directory.
You have successfully logged in.
If you wish to copy your credentials to a server, they have been saved to:
/home/junior/.cloudflared/cert.pem
3. Create a tunnel
To create a new tunnel, just do as below:
cloudflared tunnel create neotwitter
You'll get a output informing that your tunnel was created successfully.
Created tunnel neotwitter with id d90fb39e-37c9-478a-b315-173cb83dd06c
Listing files in the directory /home/junior/.cloudflared, you will see a certificate authentication and a JSON file with a big stream of characters, which is the same string as found on the Cloudflare tunnel ID. Select and copy your Tunnel ID string.
ls ~/.cloudflared/
cert.pem  d90fb39e-37c9-478a-b315-173cb83dd06c.json
4. Create our config.yml
As we are configuring our tunnel through the cloudflared utility, we need to create our config.yml file inside the /home/user/.cloudflared/ directory. This file will configure our ingresses to allow access to the website hosted on that machine.
touch ~/.cloudflared/config.yml
Listing the files in the .cloudflared directory, we now have 3 files.
ls ~/.cloudflared/
cert.pem  config.yml  d90fb39e-37c9-478a-b315-173cb83dd06c.json
Let's do the basic setup by adding the tunnel ID to the config file.
vim ~/.cloudflared/config.yml
tunnel: d90fb39e-37c9-478a-b315-173cb83dd06c
credentials-file: /home/junior/.cloudflared/d90fb39e-37c9-478a-b315-173cb83dd06c.json
The tunnel is the UUID for the tunnel we copied before. The credentials-file is the cloudflared folder, followed by the UUID .json.
Save it and close vim if you're using vim with :wq.
5. Add a DNS entry
In this step, we will add one DNS entry for your website. This is the URL that users will type in their browser to access your site. You can perform this step from the Cloudflare panel, but since we are using cloudflared, we will do it by typing the following command:
cloudflared tunnel route dns neotwitter neotwitter.juniorfox.net
6. Ingress
Ingress entries are configurations that make a website or service on your host or network accessible to the internet. This can be any host or service on your network, such as a website, a private cloud service like Nextcloud, or Jellyfin media server. It doesn't matter as long as it's an HTTP or HTTPS server on your network, you can make it available. Let's add our ingresses to the .cloudflared/config.yml file.
vim ~/.cloudflared/config.yml
tunnel: d90fb39e-37c9-478a-b315-173cb83dd06c
credentials-file: /home/junior/.cloudflared/d90fb39e-37c9-478a-b315-173cb83dd06c.json

ingress:
   - hostname: neotwitter.juniorfox.net
     service: https://192.168.122.130:80

   - service: http_status:404
7. Running the tunnel
Last, but not is bringing up your tunnel. It's just a matter of running:
cloudflared tunnel run neotwitter
8. Something went wrong
Testing the neotwitter.juniorfox.net website, the following error happened:
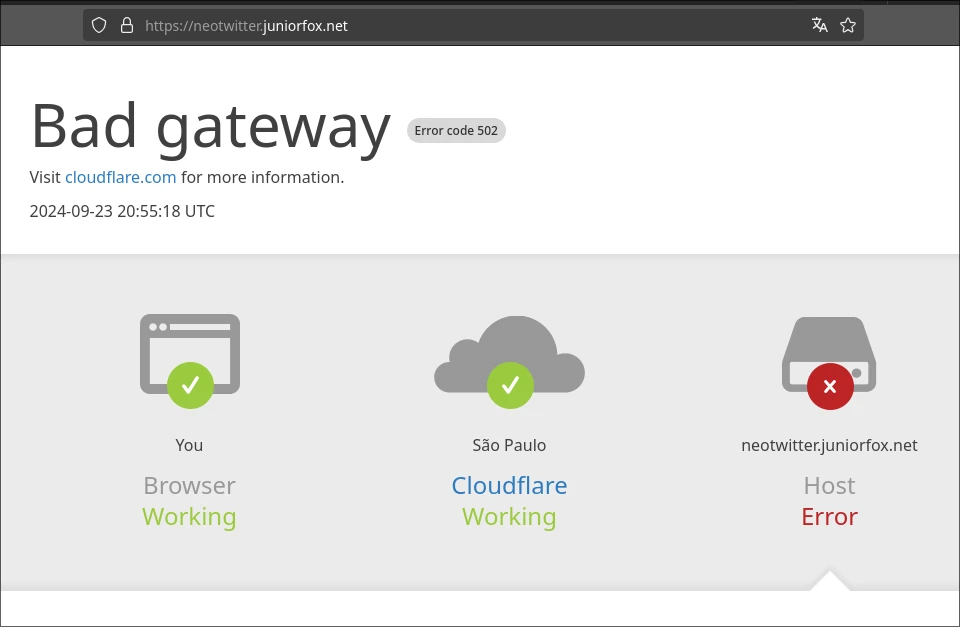
So, what went wrong? Let's take a look at the tunnel's log to see what happened.
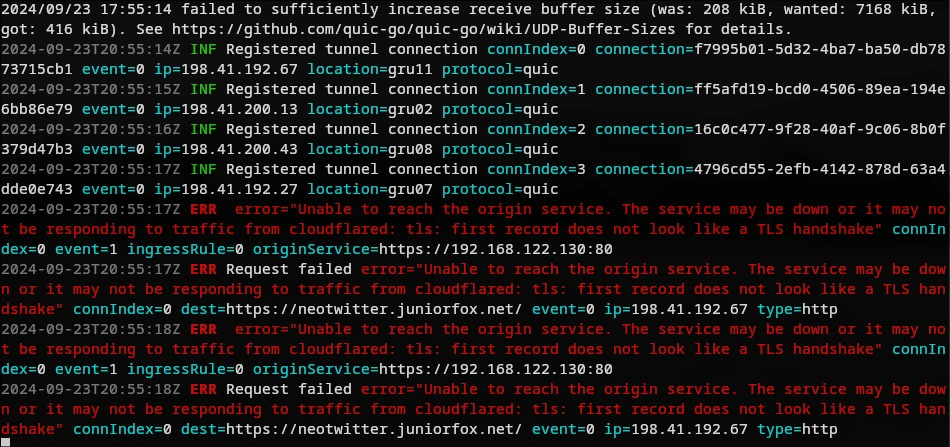
The log indicates that it couldn't estabilish connection with site. This occurried because the NGINX is serving the site over plain HTTP, not HTTPS. Let's correct this and try again.
vim ~/.cloudflared/config.yml

Start the tunnel another time
cloudflared tunnel run neotwitter
And browse to the neotwitter.juniorfox.net
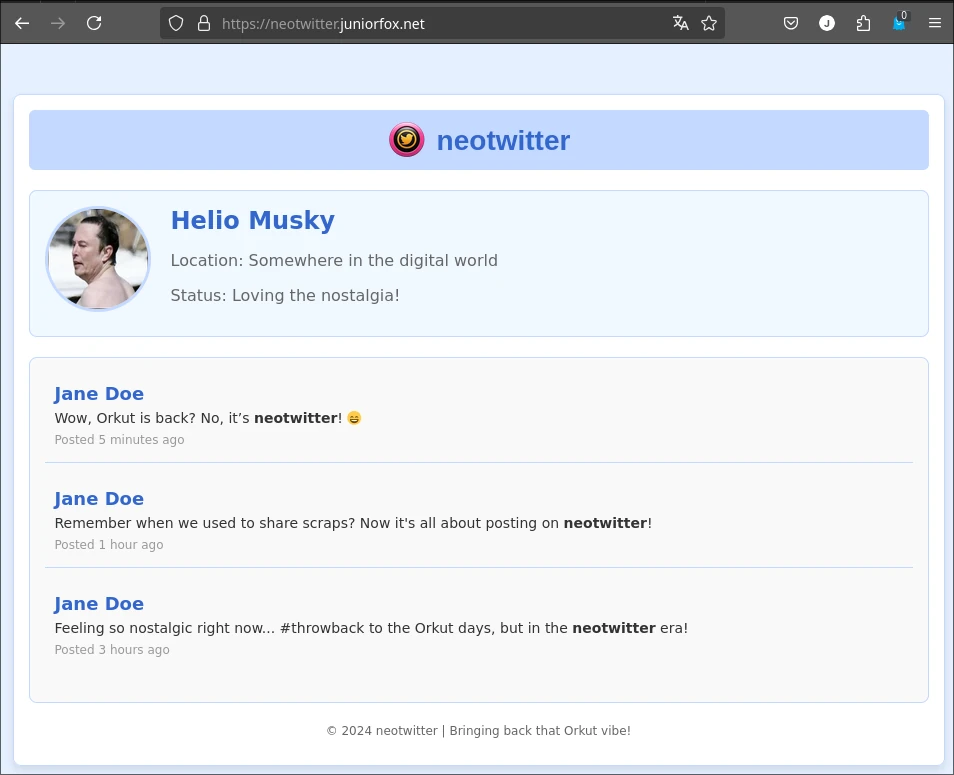
Looks like everything is working as intended. It's also cool to already have the SSL connection done.
Do you believe Neotwitter could serve as a direct replacement for Twitter, given that it's no longer operational in Brazil?
Conclusion
This concludes our article on Cloudflare, a user-friendly solution for easily getting a website online. We've covered both the benefits and potential risks of using this service. I hope this article has helped you better understand Cloudflare and assisted you in making your site or service accessible online.
keywords: twitter • x • cloudflare • network • webhost • tunnel • firewall